Plenty of folks figure shock chlorinating a well is just a matter of pouring bleach down the casing until the water smells like a public pool, then letting it sit overnight. It isn’t. Done that way you can coat the top few feet of the column with strong solution, corrode fittings, send a slug of chlorinated water against a pump seal that was never meant to see it, and still leave the bottom fifty feet of the bore untouched, because the dose never got there and nothing moved. Chlorine in solution is a fussy chemical. The hypochlorite ion holds its oxygen on a short leash — the bond is about an angstrom and two-thirds long — and it wants to let go. That is the actual job: handle a reactive chemical with respect, get it where it needs to go, keep it there long enough, and get it back out again. Most of what goes wrong happens before the first cup of bleach hits the water, starting with the amount you’d need for the gallons-per-foot figures for your casing.
Test the water before anything else
You do not treat what you have not measured. That has been true for thirty-one years at the utility and ten years on private wells, and it is still true. Pull a bacteria sample in the sterile bottle and get it to the county lab the same day. Marta at the extension office will hand you bottles and read the report back to you in plain terms if you want. While you’re at it, run. The pH matters more than people expect. Hardness seems to matter because hard water plus concentrated hypochlorite can, in my experience, leave precipitate and scale on the column pipe and the pump intake. There is no sense chlorinating a well that will be recontaminated the next rain. Before you dose, know what a foot of casing holds so you can figure the volume you are actually treating.
I keep the details in the overview of the whole process for anyone who wants the full picture before they start. The short version: test first, fix the route in, then treat.
Protect the pump and the pressure tank
The seals and the wire jacket and the check valve will take a few hours of it, but a heavy slug left sitting on top of the pump for a day will start things you do not want started. Same for the tank in there. Chlorinated water in the bladder, left too long, seems to age the rubber. The way around this is dilution and circulation — you want the chlorine mixed through the whole column, not pooled anywhere, and you want it out of the pressure tank and the household lines at the end, not in them. Some people isolate the tank entirely while they work, which is fine if your plumbing lets you. The trade-off is you then have no pressure to work with for rinsing. I leave mine in the loop but run the contact time on the short side and flush hard after. Know which one you’re doing before you start, because the middle of the job is a bad time to decide.
Circulate the whole column top to bottom
This is the step that separates a real shock from a bleach bath. The water has to move. Run a hose from an outside bib back into the well head and let the pump recirculate the column until you can smell chlorine at the hose and a strip says it’s there. That pulls the dosed water down past the pump intake, through the screen, and into the gravel pack if you have one. The technique is in how I move chlorine through the system, and it pays to take your time. Run the taps one by one until chlorine reaches each, then close it. Now the whole system is dosed: well, pump, drop pipe, pitless, house lines, water heater if you chose to include it. Then you wait. The contact time is the part that does the work. People get impatient here. Don’t. The clock is the cheapest part of the whole job and it is the one most often skipped.
If you have never introduced the chemical into the casing before, read how I get chlorine into the well first. The order matters: mix in a bucket, never dump straight, and never mix bleach with anything else, ever. The bucket gets water and bleach and nothing else.
Know what the chemical is doing
Hypochlorite is not a stable thing sitting in a jug. The bottle in the back of the garage from two summers ago may be half what it says it is. Test the water at the well head with a strip after dosing and again after contact, because that is the only way you know what you actually had working. Keep it dry, keep it cool, keep it sealed, and never store it next to anything that burns. These are not exotic rules. They are the same rules the utility yard ran on, just scaled down to a bucket.
Flush until the strip says clear
Then run the house taps. That second test is the one that tells you whether the job worked. That is when you call the driller before you reach for another jug.
If I had a friend asking about this over the fence, here is what I’d say: don’t shock a well you haven’t tested, don’t dump bleach in and walk away, and don’t assume smelling chlorine at the kitchen tap means the bottom of the bore ever saw it. Mix it in a bucket, pour it in slow, run a hose back down the casing and let the pump move it until the whole column smells like a pool, let it sit, then flush it till the strip says zero and send a bottle to the lab. If it comes back positive, your problem is a hole, not a germ.
Now that the failure modes are on the table, go watch the full video and follow it through with a notebook before you touch the well cap.
What went wrong years back was skipping the circulation on a service call because the owner was in a hurry and the well “smelled clean.” Dosed it, waited, flushed, tested clear. Two weeks later the coliform was back and I was back on that county road, this time pulling the cap and finding the seal at the pitless cracked and weeping surface water every hard rain. The chlorine had never been the problem. The second visit required the owner to obtain a new seal, cover another lab test, and endure the embarrassment of having me out twice. It cost me a Saturday. That was the last time I treated a well before I knew how the water was getting in.
I have used liquid household bleach and I have used dry calcium hypochlorite granules, and each one earns its place. Bleach is what is on the shelf at the co-op, it mixes fast, and you can pour it. Its weaknesses are that it degrades in storage and you are hauling a lot of water weight to get a little chlorine. The dry granules seem to keep their strength for a long time if they stay sealed and dry, and a small container does a big job. For my own well I use the liquid because I rotate through it and nothing sits long. For the ranch up the valley with the windmill, two hours from any help, I’d leave the dry form on the shelf with the date written on the lid.
Somebody will tell you — Len tells me, about twice a year — that the whole routine is overkill, that his grandfather’s well ran fifty years and nobody ever chlorinated it and nobody got sick. Part of that is true. But his grandfather’s well was not tested either, so nobody knows what was in it, only that nobody traced a sick week back to the tap. The wells I get called to are the other kind: the shallow one that seems to drop in a dry August, the hand-dug one under a wooden lid that the widow on the east road calls me about after every hard rain. Test before you treat is not a rule because wells are dirty. It is a rule because you cannot see the ones that are.
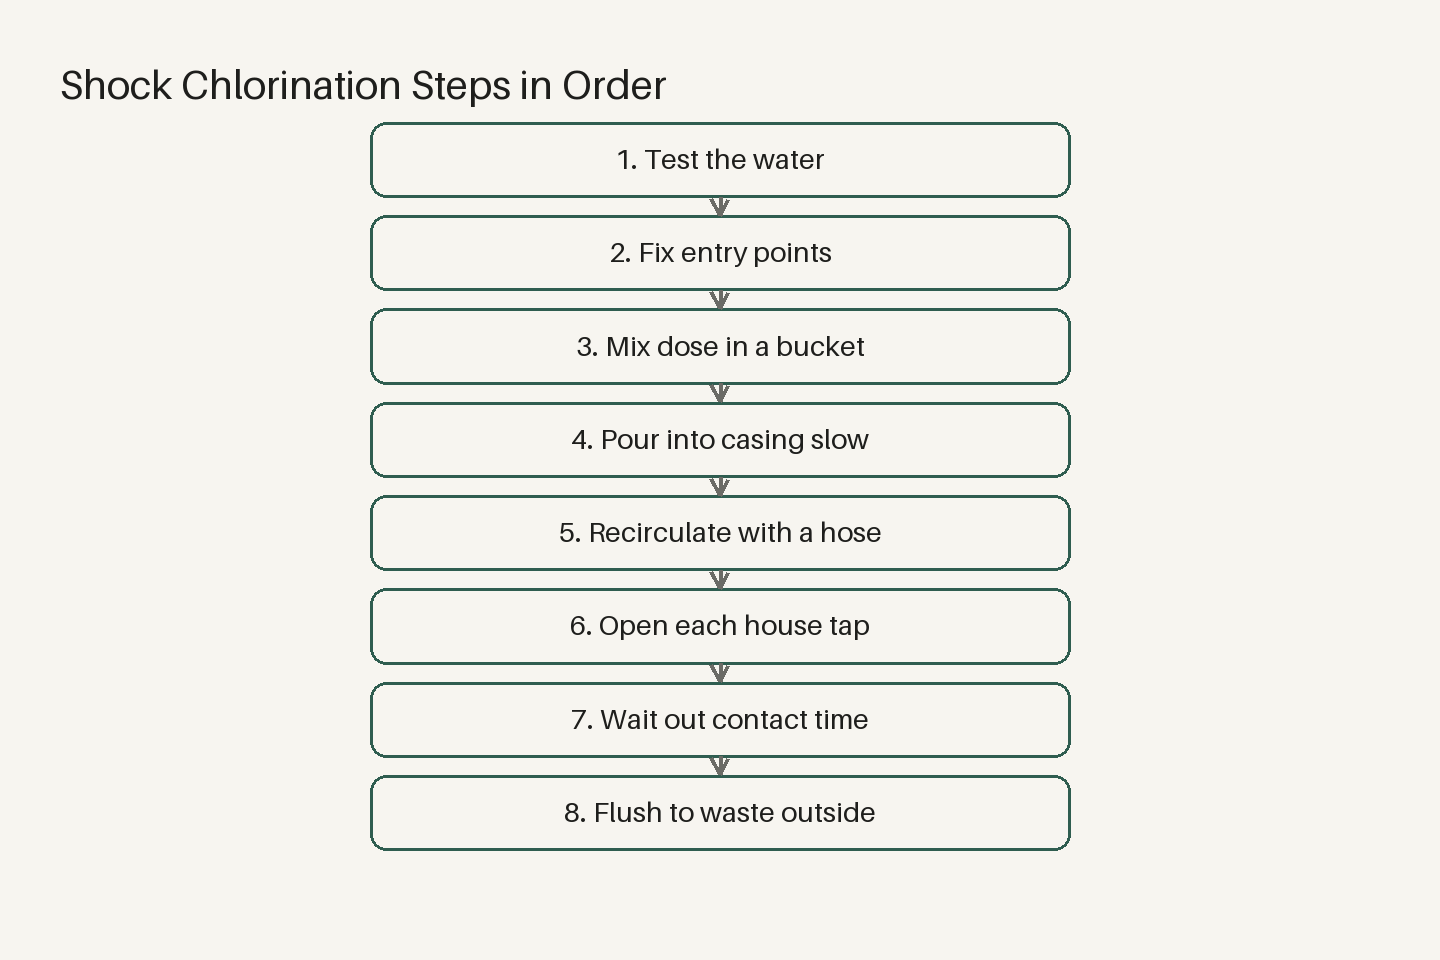
The way I actually do it, in order: pull a bacteria sample and drive it to the county lab; strip-test for pH, hardness and chlorine; read the report and fix any entry point first; mix the dose in a bucket with water; pour it into the casing slow; recirculate with a hose back to the well head until a strip at the hose reads chlorine; open each house tap until it smells, then close it; wait out the contact time without running water; flush to waste outside until strips read nothing; run the house taps clear; re-test in a week or two.
If you want to see each of those steps done with real equipment in real order, go watch the full video now and follow it at your own pace at the well head.